

Granite Sett Paving: A Comprehensive Guide to Installation and Durability
GMS Kumar
Thinking about using granite setts for your next outdoor project? You've probably seen them around – those sturdy, classic-looking stones that just seem to last forever. They look good, sure, but they're also super practical. Whether you're planning a new patio, a garden path, or even a driveway, granite sett paving is a solid choice that can really change how your space looks and feels. This guide will walk you through what you need to know, from picking the right stones to getting them laid and keeping them looking good for years.
Key Takeaways
- Granite setts offer both good looks and toughness, making them great for pathways, patios, and driveways.
- Proper ground prep is super important for making sure your granite sett paving stays put and lasts a long time.
- Installing granite setts involves careful laying, cutting, and jointing for a professional finish.
- You can get creative with granite sett paving, mixing colours, sizes, and patterns to match your style.
- Keeping your granite sett paving clean and doing small repairs will help it look good and last even longer.
Understanding Granite Sett Paving
Granite setts are a fantastic choice for outdoor paving, and for good reason. They're tough, they look great, and they really stand the test of time. Think of them as nature's own building blocks, shaped over millions of years and then expertly cut for our use. They bring a certain gravitas to a space, whether you're paving a driveway, a patio, or just a garden path.
Aesthetic And Practical Benefits
When you're planning an outdoor project, you want something that looks good but also holds up. Granite setts deliver on both fronts. They have this natural, earthy look that just works with almost any style of house or garden. Plus, they're incredibly hard-wearing, meaning they can handle a lot of foot traffic and even vehicles without showing much wear. This makes them a really smart choice for busy areas.
Enhancing Visual Appeal With Granite Setts
One of the best things about granite setts is how they can totally change the look of an area. They come in different colours and textures, so you can really play around with the design. You can go for a uniform look or mix and match to create something unique. They add a touch of class and permanence that's hard to beat. It's amazing how these simple stones can make a pathway feel so much more special.
Leveraging The Durability Of Granite Setts
Let's talk about toughness. Granite is one of the hardest natural stones out there. This means it can handle pretty much anything the weather throws at it – hot sun, freezing rain, you name it. Unlike some other paving materials that might crack or fade over time, granite setts just keep going. They're a long-term investment that pays off in terms of looks and performance. You can expect them to last for decades, which is pretty impressive when you think about it. This natural stone paving offers a robust and stylish choice for various paving projects [9aee].
Granite setts are formed deep within the Earth's crust over vast geological timescales. This slow cooling process creates an incredibly dense and strong material, which is why it's so well-suited for paving applications that need to withstand heavy use and environmental exposure.
Preparing For Granite Sett Installation
Before you even think about laying down those beautiful granite setts, there's a bit of groundwork to do. Getting this part right is super important if you want your new patio or pathway to last and not end up looking like a lumpy mess after a year or two. It’s not the most glamorous part, but trust me, it makes all the difference.
Ground Preparation For Granite Setts
This is where the real foundation of your project is built. You can't just plop setts down on bare dirt and expect good results. First off, you need to dig out the area. How deep depends on what the path will be used for – more traffic means digging deeper. You'll want to get rid of any soft soil or roots because those can cause sinking later on. Then comes the sub-base, usually a crushed aggregate like Type 1 MOT. This gets spread out and, this is key, compacted really well. A plate compactor is your best friend here; you compact it in layers to make sure it's solid. This layer is what stops water from pooling and gives your setts a stable base to sit on. A strong, well-compacted sub-base is the secret to a long-lasting granite sett installation.
Planning The Layout And Drainage
Once the ground is prepped, it's time to think about how it's all going to look and, importantly, how water will get away. Sketching out your design first is a good idea. Then, use string lines and pegs to mark it out on the ground. You need to make sure there's a slight slope, usually about 1:60, so water runs off. You don't want puddles forming on your nice new path, right? This slope needs to be consistent across the whole area, directing water away from buildings and structures. Planning the layout properly now will save you a lot of headaches later, especially when you start laying the setts.
Essential Materials And Tools
So, what do you actually need to get this done? You'll obviously need your granite setts, of course. Then there's the sub-base material, sharp sand for the bedding layer, and something for the joints – usually kiln-dried sand or a special jointing compound. For tools, think basic construction stuff: shovels, rakes, a spirit level, string lines, and a rubber mallet to gently tap the setts into place. If you're planning on cutting any setts to fit edges or curves, you'll need an angle grinder with a diamond blade. And don't forget safety gear like goggles and gloves!
Remember, the quality of your materials and the thoroughness of your preparation directly impact the final look and lifespan of your granite sett paving. Don't cut corners here; it's the foundation for everything else.
Here's a quick rundown of what you might need:
- Granite Setts: The star of the show.
- Sub-base Material: Like Type 1 MOT, for a solid foundation.
- Bedding Material: Sharp sand or a sand/cement mix.
- Jointing Material: Kiln-dried sand or specialist compound.
- Tools: Shovel, rake, compactor, mallet, level, string line, angle grinder (if needed).
Getting all your supplies together before you start makes the whole installation process much smoother.
The Granite Sett Paving Installation Process
Alright, so you've decided on granite setts for your project – nice choice! Now comes the part where we actually put them down. It might seem a bit daunting, but if you break it down, it's totally manageable. Getting this part right is key to having a beautiful, long-lasting paved area.
Laying and Grouting Granite Setts
This is where the magic starts to happen. You'll be placing each sett by hand, making sure they're snug and level. It’s important to keep a consistent gap between them; this isn't just for looks, it's so you can fill those gaps later. Think of it like fitting puzzle pieces, but much heavier and more permanent.
- Place the first sett carefully.
- Use a rubber mallet to gently tap it into place, ensuring it's level with its neighbors.
- Continue this process, working in a pattern that makes sense for your design.
- Keep an eye on your string lines to maintain straightness and the correct slope for drainage. Establishing the correct falls and levels for the finished surface is really important [7b13].
Once all the setts are down and you're happy with how they look, it's time for grouting. This usually involves sweeping a mix of kiln-dried sand and cement, or a specialized jointing compound, into the gaps. This locks everything together and stops weeds from taking root.
Cutting and Shaping Granite Paving Stones
Sometimes, you'll run into edges or corners where a full sett just won't fit. That's where cutting comes in. You might need an angle grinder with a diamond blade for this. It can be a bit dusty and noisy, so make sure you've got your safety gear on – goggles and a mask are a must.
- Measure the space accurately.
- Mark the sett where you need to cut.
- Make the cut slowly and steadily. It's better to take off too little than too much.
- Always let the cut edge cool down before handling it.
This step is all about precision. Getting these custom fits right makes the whole paved area look much more professional and finished.
Achieving Final Compaction and Finishing Touches
After grouting, there's usually a bit more compaction needed. Sometimes this is done with a plate compactor, but for smaller areas, a hand tamper might do. The goal is to make sure everything is solid and won't shift.
Proper ground preparation is the bedrock of any successful paving project. Without a stable sub-base and a well-leveled bedding layer, even the most carefully laid setts can settle unevenly over time, leading to a bumpy surface and potential damage.
Finally, give everything a good sweep to remove any excess grout or sand. If you're sealing the setts, now's the time to do it. This adds an extra layer of protection and can make the colors pop a bit more. You might also want to add some edging to really frame your new paved area. It's these little details that make a big difference. If you're planning to tackle this yourself, remember that measuring and marking the area correctly is the very first step [7e14].
Design Possibilities With Granite Setts
Granite setts are surprisingly versatile, letting you get pretty creative with your outdoor spaces. They aren't just for old-fashioned pathways; you can really mix them up to create something unique. Their natural look works with almost any style you can think of.
Versatile Design Applications
Think about how you want your space to feel. Do you want a formal garden path, a rustic driveway, or a modern patio? Granite setts can do it all. They're great for:
- Creating intricate patterns for a real 'wow' factor.
- Laying down simple, clean lines for a minimalist look.
- Forming gentle curves that guide the eye through your garden.
- Using them as a border to define different areas.
Pairing Granite Setts With Other Materials
One of the best things about granite setts is how well they play with other materials. You're not limited to just granite. Try pairing them with:
- Brick: For a classic, timeless feel, especially around older homes.
- Gravel: To create a contrast in texture and colour, good for driveways or garden paths.
- Wood: Think of wooden decking next to a granite sett patio – it adds warmth.
- Concrete: For a more modern, industrial vibe, concrete slabs can be bordered with setts.
This kind of mixing and matching can really make your design pop. You can find some great ideas for paver patterns that simplify creating sophisticated outdoor spaces here.
Contemporary Trends In Granite Sett Landscaping
People are getting really inventive with granite setts these days. Forget just laying them in straight lines. Some popular ideas right now include:
- Mixing colours: Using different shades of granite setts together to make unique mosaics or borders.
- Creating 'flow': Laying setts in sweeping curves that mimic natural landscapes.
- Highlighting features: Using setts to edge flower beds, water features, or seating areas.
It's all about making your outdoor area feel more dynamic and personal. You can explore a lot of 2026 residential paver design ideas to get inspired for your own yard here.
Granite setts have been around for ages, and for good reason. They're tough, they look good, and they can be shaped into pretty much any design you can imagine. Whether you're going for a grand entrance or a quiet corner, they've got you covered.
| Material Combination | Aesthetic Effect |
|---|---|
| Grey Setts + Red Brick | Traditional, warm |
| Black Setts + Concrete | Modern, sleek |
| Mixed Colour Setts + Gravel | Rustic, textured |
Maintaining Your Granite Sett Paving
Even the toughest materials need a little attention now and then, and granite setts are no different. Keeping your granite sett paving looking sharp isn't a huge chore, but a bit of regular care goes a long way. It’s not just about looks, either; proper upkeep helps your paving last even longer.
Routine Cleaning and Care
First things first, get into the habit of sweeping. A quick sweep a few times a week will get rid of leaves, dirt, and other bits that can start to break down or stain the stone. For a deeper clean, especially if you notice any moss or algae starting to creep in, a gentle power wash can do wonders. Just be careful not to blast the joints too hard, as you don't want to wash out the filling. Avoid using harsh chemicals, as these can sometimes dull the granite's natural shine or even damage the surface over time. Think of it like washing your car – a gentle soap and water usually does the trick best.
Here’s a quick rundown of what to do:
- Sweep regularly: Get rid of loose debris like leaves and dirt.
- Gentle power wash: Use low pressure for stubborn grime, moss, or algae.
- Spot clean spills: Wipe up any spills, especially oily or acidic ones, right away.
- Check the joints: Make sure the sand or grout between the setts is still full and firm.
Keeping your granite setts clean is the first step in maintenance. Brushing off debris and dirt regularly can prevent staining and discolouration. For a deeper clean, you can use a power washer, but do take care not to dislodge the jointing material between the setts. It’s also advisable to avoid harsh chemical cleaners which can damage the granite surface.
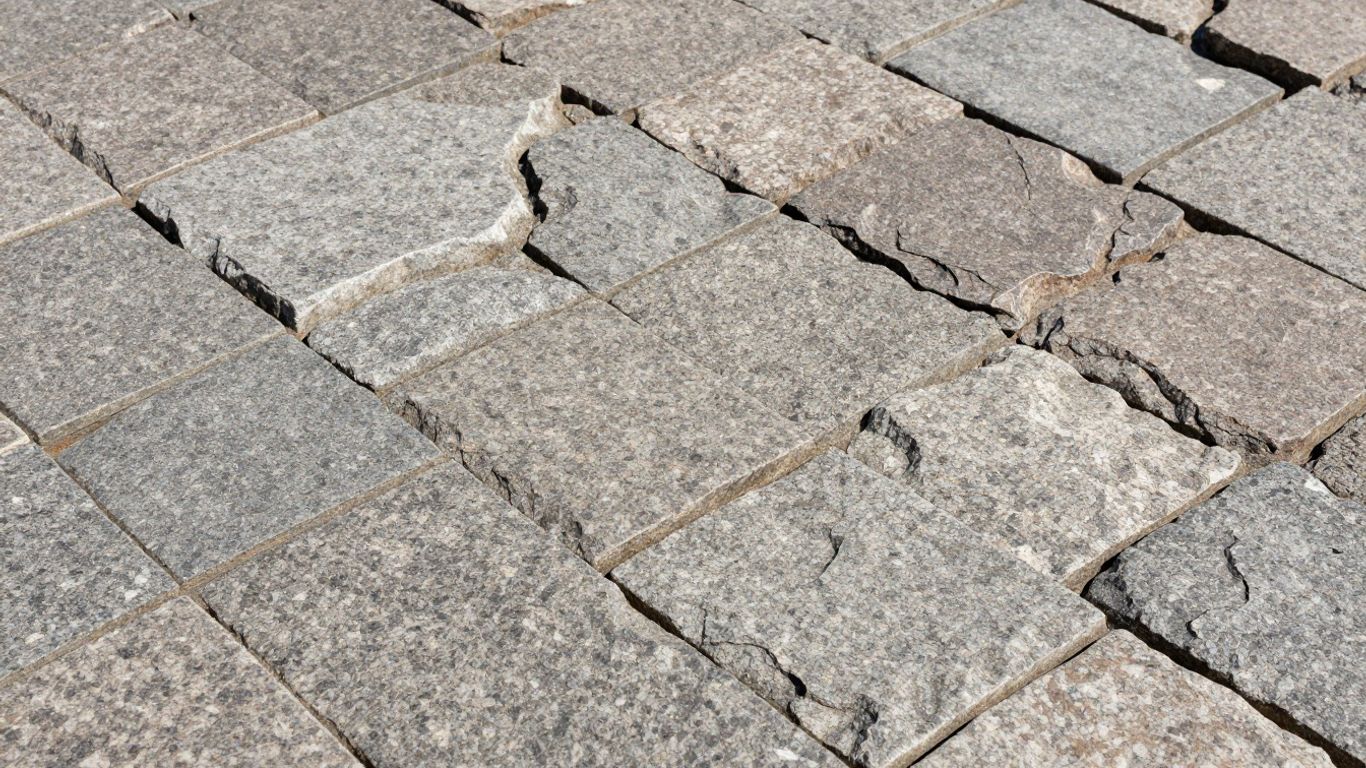
Addressing Chips and Cracks
Granite is incredibly strong, but sometimes, especially with heavy impacts or if something really heavy gets dragged across it, you might see a small chip or even a crack. For minor chips, you can often get a stone filler from a hardware store that can blend in pretty well. If you have a bigger issue, like a sett that's badly cracked or broken, it might be time to think about replacing that particular stone. It’s usually easier to fix these things when they’re small, so keep an eye out.
Long-Term Durability Through Maintenance
When your granite setts are laid properly with well-compacted joints, they're already set up for a long life. The key is to keep those joints topped up. If you notice gaps appearing, especially after winter, just sweep in some more kiln-dried sand or appropriate jointing compound. This stops weeds from taking root and helps keep the whole surface stable. For a bit of extra protection and to really make the colours pop, you might consider sealing your paving every few years, following the manufacturer's advice. This adds another layer against stains and general wear and tear, making sure your granite paving stays a beautiful feature of your outdoor space for ages. You can find more tips on maintaining granite paving slabs to keep them looking their best year-round.
Choosing The Right Granite Setts
Picking out the right granite setts for your project is kind of like picking out the right paint color for your living room – it makes a big difference in the final look. You've got a few main things to think about: the color, how the surface feels and looks, and what size will work best. Getting these right means your paving will not only look good but also work well for what you need it to do.
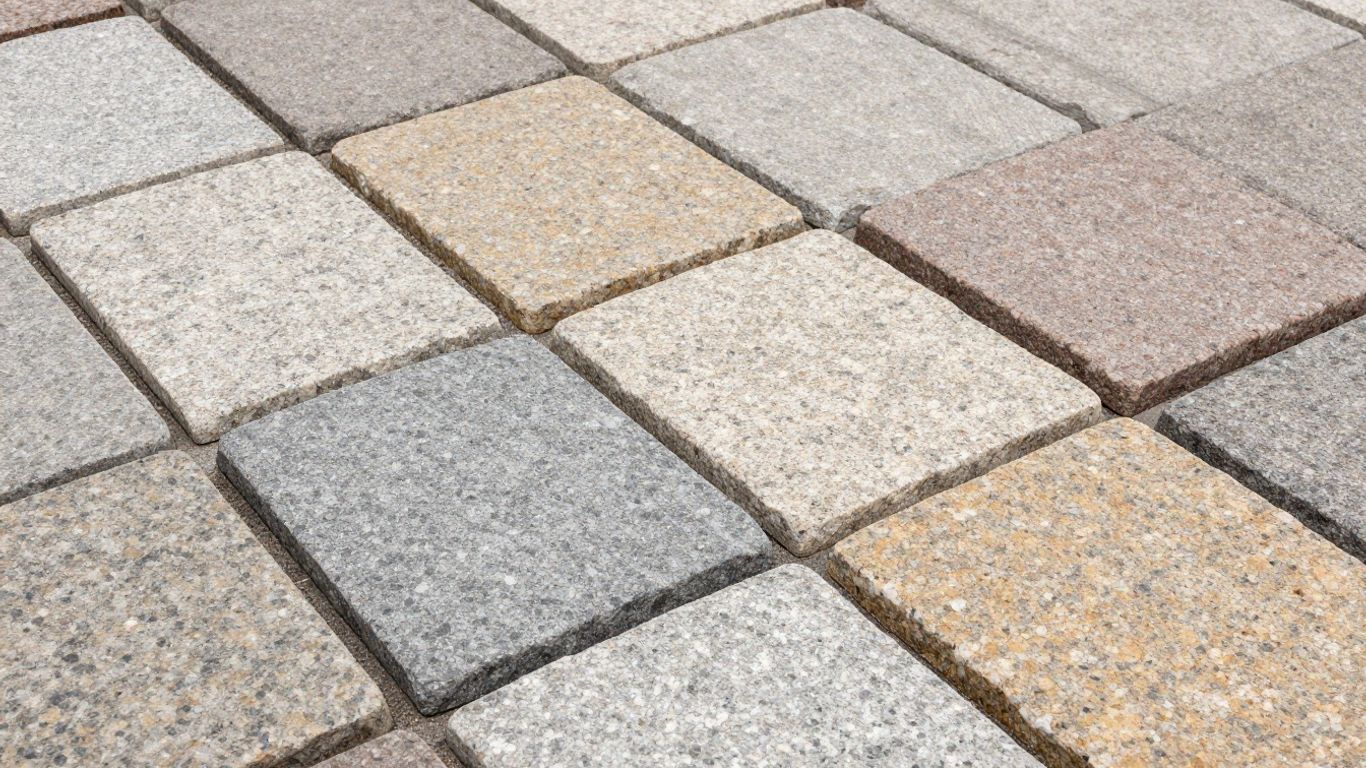
Exploring Colour Options
Granite setts come in a few main color families, and each one gives a different vibe. You've got your classic grays, which are super versatile and kind of go with everything. Then there are the reds, which can add a bit of warmth and character, especially if you want something that stands out a little. And for a really sleek, modern look, black granite setts are the way to go. They have this sophisticated feel that can really make a space pop. The color you choose will set the tone for your entire outdoor area.
Understanding Different Finishes
The way the surface of the sett is treated, or its finish, really changes how it looks and feels. You can get them with a natural split finish, which gives a more rugged, textured appearance – great for that rustic charm. If you want something a bit smoother but still with grip, a flamed finish works well; it's a bit rougher to the touch and helps with slip resistance. For a really clean, contemporary look, a sawn finish gives you a smooth, sleek surface. Think about how the area will be used when you pick your finish; you don't want something too slippery if it's going to get wet a lot.
Selecting Appropriate Sizes For Your Project
Granite setts aren't just one-size-fits-all. They come in different dimensions, and the size you pick can affect both the look and the installation. Smaller setts can be used to create intricate patterns, like those you might see in historical areas, and they're great for curves. Larger setts tend to give a more solid, grounded feel and can be quicker to lay over large areas. It's worth looking at some examples of granite sett patterns to see how different sizes come together. You'll also want to consider the scale of your project; a tiny patio might look overwhelmed by huge setts, while a large driveway might look too busy with tiny ones. It’s a good idea to get a feel for the different sizes available, maybe even ordering a few samples, to see what fits your space best. You can find out more about different types of cobbles and their uses, which can be helpful when deciding on sizes, especially if you're looking at projects in places like Arizona.
When you're choosing your granite setts, think about the overall style you're going for. Are you aiming for a timeless, traditional feel, or something more modern and clean? The color, finish, and size all play a part in achieving that specific look. Don't be afraid to mix and match if your design calls for it, but always keep the end goal in mind.
Wrapping It Up
So, there you have it. Granite setts really are a solid choice for your outdoor projects. They look good, they last ages, and honestly, they're not as hard to put down as you might think, though getting it right takes some care. Whether you're going for a fancy patio or just a simple path, these stones can really make a difference. Just remember to prep the ground well and take your time with the laying. A little effort upfront means you'll have a beautiful, sturdy surface that you can enjoy for years without much fuss. It’s a good investment for your home, for sure.
Frequently Asked Questions
What exactly are granite setts?
Granite setts are basically small, block-shaped pieces of granite stone. Think of them like sturdy little bricks made from natural rock. They're really tough and look great, making them a popular choice for paths, patios, and driveways.
Why should I choose granite setts for my yard?
Granite setts are super durable, meaning they can handle lots of walking and even cars driving on them without getting damaged easily. They also look really classy and can make your outdoor space seem more elegant. Plus, they don't need a lot of fuss to keep them looking good.
How do you put granite setts down?
Putting them down involves a few steps. First, you have to prepare the ground really well by digging it out and creating a solid base. Then, you lay the setts on a bed of sand, making sure they're level and spaced just right. Finally, you fill the gaps between them with sand or special grout to keep them in place.
Can I create different looks with granite setts?
Absolutely! Granite setts come in different shades of grey, and you can lay them in all sorts of patterns, like straight lines, curves, or even fancy designs. You can also mix them with other materials like gravel or different coloured stones to get a unique look.
How do I clean and care for my granite sett paving?
Keeping them clean is pretty simple. Just sweep them regularly to get rid of leaves and dirt. If they get really dirty, you can carefully use a hose or a gentle power washer. It's best to avoid strong cleaning chemicals, as they might harm the stone.
What if a granite sett gets chipped or broken?
Granite is very strong, but if a sett does get damaged, small chips can often be fixed with a special stone filler. For bigger breaks, you might need to replace the damaged sett with a new one to keep your paving looking its best.


