

Effortless Wood Worktop Cleaning: Your Ultimate Guide
GMS Kumar
So, you've got yourself a nice wood worktop. They look great, right? But keeping them that way can feel like a puzzle sometimes. You want to keep it clean and looking good without all the hassle. This guide is here to help you figure out exactly how to clean wood worktops, making sure they stay a beautiful part of your kitchen for years to come. We'll cover the daily stuff, how to deal with those annoying marks, and even how to give it a bit of a refresh when needed. Let's get started.
Key Takeaways
- Wipe up spills right away with a soft cloth to prevent stains. For wood, always dry the surface thoroughly after cleaning.
- Use only mild soap and warm water for general cleaning. Avoid harsh chemicals, as they can damage the wood's finish.
- Regularly re-oil your wood worktop, typically every six months to a year, to keep it protected and prevent drying out.
- Minor scratches can often be sanded out, and applying a new protective finish can revive dull surfaces.
- Protect your worktop by using cutting boards, trivets for hot pans, and coasters for drinks.
Understanding Your Wood Worktop's Needs
So, you've got a wood worktop. That's great! They look fantastic, right? But wood is a natural material, and like anything natural, it has its own quirks and needs. It's not like a solid slab of granite or a piece of laminate that you can pretty much forget about once it's installed. Wood needs a bit of attention to keep it looking its best and to make sure it lasts for ages.
The Natural Qualities of Timber
Wood is alive, in a way. It breathes, it expands, it contracts. This means it can react to changes in temperature and humidity. Different types of wood have different characteristics, too. Some are harder and more dense, like oak, while others are softer and might show marks more easily. Understanding the specific type of wood you have is the first step to caring for it properly. It's like knowing if your pet is a cat or a dog – they both need care, but the specifics are different.
Why Sealing is Essential for Longevity
Think of sealing or finishing your wood worktop as giving it a protective coat. Without it, wood is pretty much an open invitation for spills, stains, and moisture. Water can seep in, causing swelling or even rot over time. Food and drinks can leave permanent marks. A good seal creates a barrier, making the surface more resistant to these everyday kitchen hazards. It's not about making it indestructible, but about giving it a fighting chance against the daily grind. Regular upkeep, like wiping the surface with a soft, damp cloth and mild soap, is key, but the seal is your first line of defense.
Recognizing When Re-Oiling is Necessary
How do you know when it's time to give your worktop some extra love? It's usually pretty obvious. If water stops beading up on the surface and instead starts to soak in or leave a dark spot, that's a big sign. You might also notice the wood looking dull, dry, or feeling rougher than usual. It's not a complicated process, and you don't need any special skills to do it. Restoring and resurfacing these surfaces doesn't demand specialized expertise. A simple test is to just put a drop of water on the surface. If it beads up nicely, you're probably good for a while. If it spreads out or soaks in, it's time to reach for the oil.
Daily Cleaning Routines for Wood
Keeping your wood worktop looking its best doesn't have to be a chore. A few simple habits can make a big difference in its appearance and how long it lasts. It’s really about being mindful in the moment.
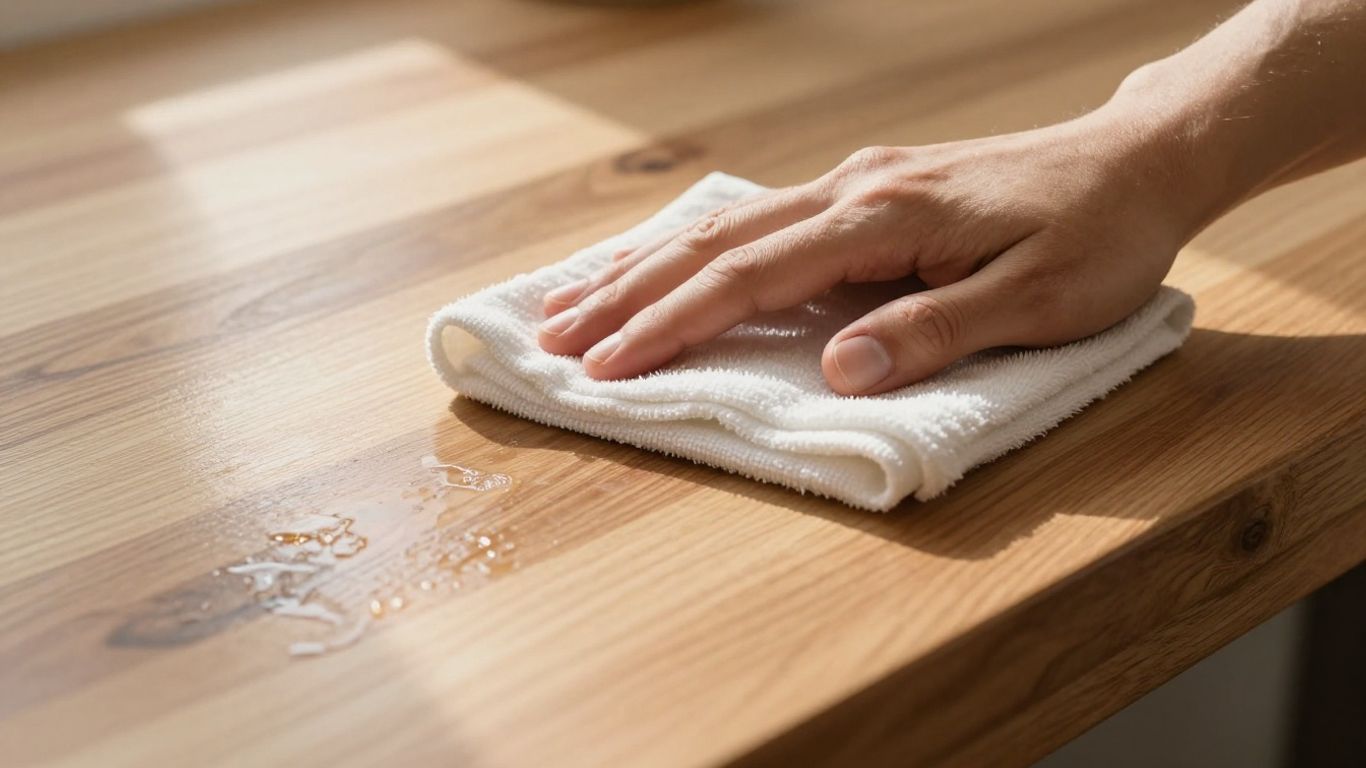
Wiping Away Spills Promptly
This is probably the most important thing you can do. Wood, especially if it's not heavily sealed, can absorb liquids. Don't let spills just sit there. Grab a cloth or paper towel and wipe them up right away. This prevents stains from setting in and stops moisture from seeping into the wood, which can cause damage over time. Think of it as a quick, no-fuss habit that saves you bigger problems later.
Using Gentle Cleaning Agents
When it comes to cleaning, less is definitely more for wood. You don't need harsh chemicals or abrasive scrubbers. A soft cloth dampened with warm water is often enough for everyday messes. If you need a bit more cleaning power, a tiny drop of mild dish soap mixed with water works wonders. Just make sure to rinse the cloth well and wipe away any soap residue afterward. Avoid anything acidic, like vinegar, or alkaline, as these can strip away the protective finish.
The Importance of Thorough Drying
After you've wiped down your worktop, whether it's just with water or a mild cleaning solution, it's vital to dry it completely. Use a clean, dry, soft cloth to buff away any remaining moisture. Leaving water to air dry can lead to water spots or, worse, can encourage the wood to swell or warp over time. Making sure the surface is bone dry after every cleaning is key to maintaining its integrity.
A little bit of preventative care can save you a lot of headaches down the line. It's about being mindful during everyday use, not about constant, heavy-duty cleaning.
Here’s a quick look at what to do:
- Immediate Spill Cleanup: Grab a cloth and wipe up any liquid or food spills the second they happen.
- Gentle Washing: For general cleaning, use a damp cloth with warm water. A tiny bit of mild dish soap is okay for tougher spots.
- Rinse and Dry: Always wipe away any soap residue with a clean, damp cloth, and then dry the entire surface thoroughly with a separate dry cloth.
Following these simple steps will ensure that sealing and fitting your wooden worktops is quite painless, and the adhering to the immediate after-care schedule results in a beautifully oiled worktop that accentuates the wonderful tight grains of the timber and has a protective, water-resistant surface for the hub of your home. For most worktops, especially things like quartz or laminate, daily cleaning is super simple. Just grab a damp cloth, maybe with a little bit of mild soap, and wipe it down. Wipe up spills as soon as they happen; don't let them sit around. This is probably the single most important thing you can do. For wood, you'll want to dry it off completely after wiping.
Addressing Stains and Marks on Wood
Even with the best care, accidents happen. Spills can happen, water can sit a bit too long, or a hot pan might be placed down without a trivet. Don't panic! Most common marks on wood worktops can be dealt with using simple methods. The key is to act quickly and use the right approach for the specific type of blemish.
Tackling Common Kitchen Spills
Grease, wine, coffee – these are the usual suspects in any kitchen. For fresh spills, blot them up immediately with a clean cloth. If a stain has set in, try a mild solution of warm water and a drop of dish soap. Gently wipe the area, being careful not to scrub too hard, which could damage the finish. For stubborn spots, a paste made from baking soda and water can sometimes lift the stain. Apply it, let it sit for a few minutes, then wipe away gently. Remember to always test any cleaning solution on an inconspicuous spot first, just to be safe. This is a good general rule for cleaning wood surfaces.
Removing Water Rings and Heat Marks
Water rings are often caused by moisture sitting on the surface, especially if the sealant has worn down. Sometimes, a simple buff with a soft cloth is enough. If the ring is stubborn, you can try gently rubbing the area with a very fine steel wool (grade 0000) in the direction of the wood grain. For heat marks, which can look like white or dark spots, the approach is similar. You might need to lightly sand the affected area and then re-oil it to restore the finish. If the mark is deep, sanding might be necessary.
Dealing with Discoloration
Discoloration can happen for various reasons, from sun exposure to certain food items. If you notice black marks, they might be from surface grime and grease that has built up over time. A good clean with warm water and a little washing-up liquid can often make these marks disappear. Black marks are usually not as serious as they first appear. For more general discoloration, especially if it's widespread, you might be looking at needing to re-oil the entire worktop to achieve an even look. This process helps to refresh the wood and bring back its natural color.
Wood is a natural material, and it's normal for it to show signs of use over time. Instead of aiming for a 'perfect' surface that never changes, think of it as developing a patina. Minor marks tell the story of your kitchen's life.
Here's a quick rundown of what to try for different marks:
- Grease/Food Stains: Blot immediately. Use mild soap and water. Baking soda paste for tougher spots.
- Water Rings: Buff with a soft cloth. Try fine steel wool (grade 0000) gently.
- Heat Marks: Light sanding and re-oiling. For deep marks, more sanding might be needed.
- General Discoloration/Black Marks: Warm water and dish soap. Re-oiling the whole surface if needed.
Restoring Wood Worktops
Over time, even the most well-cared-for wood worktop can start to show its age. Little nicks, dull spots, or maybe a water ring or two can creep in. But don't worry, bringing your worktop back to its former glory is totally doable. It's not like you have to replace the whole thing.
Sanding Out Minor Scratches
When you notice those small scratches that just won't wipe away, sanding is your best friend. You don't need to go crazy here; we're talking about light sanding to smooth things out. Start with a fine-grit sandpaper, maybe around 180 or 220 grit. Gently sand in the direction of the wood grain. The goal is to level out the scratch, not to remove a lot of wood. After you've gone over the scratched area, you might want to lightly sand the entire surface to make sure the finish is even. This is a good time to really get a feel for the wood and see where it needs a little extra attention. If you're looking to get your worktop looking its best, sanding is a key step.
Applying Protective Finishes
Once you've sanded away those imperfections, it's time to protect your worktop. This is where you'll reapply an oil or a sealant. If you're using oil, like a Danish or finishing oil, apply it generously. Work it into the wood with a clean cloth, making sure to cover every inch. You'll likely need a few coats, letting each one soak in before applying the next. It's a bit like giving your worktop a good moisturizer. This step is super important for keeping the wood from drying out and getting stained again. It also brings back that lovely natural color.
Revitalizing Dull Surfaces
Sometimes, your worktop just looks a bit tired, even if there aren't obvious scratches. The finish might have worn away, leaving the wood looking dull and less vibrant. A good way to perk it up is with a light re-oiling. You don't necessarily need to do a full sanding if the surface is still in decent shape. Just a good clean, followed by a couple of thin coats of your chosen wood oil, can make a world of difference. It's like a quick spa treatment for your kitchen counter. You'll see the grain pop and the surface regain its healthy sheen. It’s amazing what a bit of oil can do to make things look new again.
Taking the time to restore your wood worktop isn't just about making it look good; it's about preserving it. A little effort now can save you a lot of hassle down the line and keep your kitchen looking its best for years to come. It’s a rewarding process, honestly.
Here’s a quick rundown of what you might need:
- Fine-grit sandpaper (180-220 grit)
- Clean, lint-free cloths
- Wood oil or sealant (food-safe recommended)
- Optional: Tack cloth for dust removal
Remember, patience is key. Don't rush the drying times between coats, and you'll be rewarded with a beautifully restored worktop. For more detailed advice on bringing your surfaces back to life, check out restoring wooden worktops.
Preventative Measures for Wood Surfaces
Okay, so we've talked about cleaning and fixing up your wood worktop, but what about stopping problems before they even start? It’s all about being smart with how you use your kitchen surfaces day-to-day. Think of it like this: a little bit of care now saves a whole lot of hassle later.
Utilizing Cutting Boards Effectively
This one's a biggie. I know, I know, sometimes it feels easier to just chop straight onto the worktop, especially if it looks really tough. But honestly, even the hardiest wood can get nicked and scratched this way. Using a good quality cutting board is probably the single best thing you can do to protect your wood. It keeps your knives sharper for longer too, which is a bonus. There are some really neat end-grain chopping blocks out there that are super strong and won't dull your knives. Plus, some of them are even heat-resistant, so they pull double duty.
Protecting Against Hot Pans
This is where things can get dicey. Wood and extreme heat just don't mix well. Unless you've got special heat rods built into your worktop (which is a cool idea!), you absolutely need to use trivets or hot pads. Don't just plop a steaming pot straight from the stove onto the wood. It can scorch, discolor, or even cause structural damage over time. It’s not just about preventing immediate burn marks; it’s about the long-term health of the wood. A simple trivet is a small step that makes a huge difference.
Using Coasters for Drinks
Remember those water rings we talked about? They’re usually caused by condensation from cold drinks. Wood can absorb moisture, and if it's not properly sealed or the sealant is wearing thin, that moisture can leave a mark. Always have coasters handy for glasses, especially if they're icy cold. It’s a simple habit to get into, and it stops those unsightly rings from forming. It’s a small thing, but it keeps the surface looking clean and new. For materials like laminate worktops, this is also a key step to prevent damage.
Being mindful during everyday use is the name of the game. It's not about constant, heavy-duty cleaning, but rather about adopting a few simple habits that prevent damage from happening in the first place. A little bit of preventative care can save you a lot of headaches down the line and keep your worktop looking great for years.
Advanced Wood Worktop Treatments
So, you've got your wood worktop looking pretty good, but maybe you're thinking about taking its protection and appearance to the next level. That's where some of the more advanced treatments come in. These aren't your everyday cleaning tasks; they're more about long-term care and really making that wood shine.
Exploring Nano-Coating Options
This is where some pretty neat 21st-century chemistry comes into play. Nano-coating treatments create a super tough, stain, and water-resistant surface. It's designed to need very little maintenance once it's on. The cool part is that it can actually bring out the natural color of the wood, giving it a smooth, wonderful finish. People say it can even triple the lifespan of the wood. Once it cures, the timber gets much harder, making it really easy to live with day-to-day.
The Benefits of Professional Oiling Services
While you can certainly oil your worktop yourself, and many find it a satisfying job, sometimes letting the pros handle it makes a big difference. Professional services often use specific oils, like pure linseed oil, that soak deeper into the wood. This means the worktop might need less frequent re-oiling down the line and can achieve a really deep, glimmering finish. It's a way to get that ultimate peace of mind knowing it's been done right from the start, giving you a superior finish compared to DIY attempts. You can find custom-made solid wood worktops configured to your exact needs.
Achieving a Water-Resistant Finish
Getting that water-resistant finish is key to keeping your wood worktop looking great for years. It's not just about the initial sealing; it's about maintaining that protective layer. A good way to check if your worktop is still water-resistant is the water bead test. If you put a drop of water on the surface and it beads up nicely, you're good to go. If it starts to soak in or flatten out, it's a sign that it's time to reapply a protective finish. This could be a simple re-oiling or a more involved process depending on the current state of your worktop. Choosing the right wood coatings can make a significant difference in how well your worktop repels moisture and stains.
Keeping your wood worktop protected is an ongoing process. While daily cleaning is important, these advanced treatments offer a way to significantly boost its durability and aesthetic appeal, making it more resilient against the rigors of kitchen life.
Keeping Your Worktop Looking Great
So, we've gone over a bunch of ways to keep your worktop looking good, no matter what it's made of. It really comes down to knowing your material and giving it a little bit of regular attention. Whether you've got a fancy quartz surface or a classic wooden one, a quick wipe-down and knowing what to avoid can make a huge difference. It’s not about spending hours scrubbing, but more about being mindful day-to-day. A little bit of care now means you get to enjoy your kitchen or workspace for a long time without worrying about it looking worn out. Happy cleaning!
Frequently Asked Questions
How often should I oil my wood worktop?
You should plan to oil your wood worktop about every six months to a year. How often you need to do it really depends on how much you use it. If you notice water soaking in instead of beading up, it's probably time for another coat of oil.
What's the best way to clean wood worktops daily?
For everyday cleaning, just use warm water and a soft cloth. If there's a bit of sticky stuff, a tiny bit of mild dish soap is okay. The most important thing is to wipe up spills right away and then dry the surface completely with a clean cloth.
Can I cut directly on my wood worktop?
It's best not to cut directly on your wood worktop. Even though wood is tough, using a cutting board will help prevent scratches and keep your knives sharp. Think of it like protecting your favorite shoes – you wouldn't want to scuff them up!
How do I get rid of water rings or heat marks on wood?
For light scratches, you can often sand them down gently and then re-oil the area. For water rings or heat marks, it might take a bit more work. Sometimes a light sanding and re-oiling can help, but severe marks might need professional attention or a more intensive refinishing process.
Are there special cleaners I should use for wood worktops?
No, you don't need special cleaners. Just stick to warm water and a mild dish soap. Avoid harsh chemicals, bleach, or anything acidic or alkaline, as these can damage the wood or strip away the protective oil finish.
What is nano-coating for wood worktops?
Nano-coating is a modern treatment that uses tiny particles to create a super tough, water-resistant, and stain-proof surface on wood. It helps protect the wood, makes it last much longer, and keeps its natural color looking great with very little cleaning needed.


