

DIY Concrete for Worktops: A Budget-Friendly Alternative to Stone
GMS Kumar
Thinking about updating your kitchen or bathroom counters but wincing at the price tags? You're not alone. High-end countertops can really eat into a renovation budget. But what if I told you there's a way to get a stylish, custom look without breaking the bank? We're talking about a DIY cement worktop. It might sound a little daunting, but it's totally doable and can give your space a really unique, modern vibe. This guide will walk you through everything you need to know to create your own amazing cement worktop.
Key Takeaways
- A cement worktop offers a stylish and budget-friendly alternative to expensive countertop materials.
- Careful planning is needed, including gathering the right tools and materials for your concrete for worktops project.
- Creating custom molds and ensuring a proper mix are vital steps before pouring your cement worktop.
- Proper pouring, curing, and finishing techniques are important for a durable and attractive cement worktop.
- Regular cleaning and sealing will help maintain the beauty and longevity of your new cement worktop.
Understanding The Appeal Of Concrete For Worktops
So, you're thinking about a cement worktop for your kitchen or bathroom? That's awesome! It's a really cool way to get a high-end look without, you know, the super high-end price tag. It's definitely a project that takes some planning, but the payoff is a totally unique and durable surface that you can really make your own. Let's break down what goes into it.
Why Choose A Cement Worktop?
Honestly, cement countertops are gaining popularity for good reason. They offer a really distinct, modern aesthetic that can fit into a lot of different kitchen styles, from industrial chic to minimalist modern. Plus, they're incredibly tough. When done right, a concrete countertop can last for decades. Unlike some other materials, you can customize the color, shape, and even embed things into it if you're feeling adventurous. It's a chance to get something truly custom. Concrete countertops offer impressive durability and strength, resembling the natural look of rocks.
Budgeting For Your Cement Worktop
Okay, let's talk money. While DIY concrete countertops are way cheaper than hiring professionals, they're not exactly free. You've got to factor in the cost of the cement mix, any colorants or additives, mold-making materials, and finishing supplies like sealers and polishes. It's smart to get a rough estimate before you start.
Here's a general idea of what you might spend:
| Item | Estimated Cost Range |
|---|---|
| Cement Mix | $20 - $50 |
| Reinforcement (Mesh) | $15 - $30 |
| Mold Materials | $30 - $70 |
| Sealers & Polishes | $25 - $60 |
| Colorants/Additives | $10 - $40 |
| Total Estimated | $100 - $250+ |
Keep in mind, these are just ballpark figures. Your actual costs will depend on the size of your worktop, the specific products you choose, and where you live. It's always a good idea to check out resources for tools and materials to get current pricing.
Comparing Costs To Other Materials
When you look at materials like granite or quartz, concrete can be a real money-saver. While quartz countertops are known for their durability and low maintenance, they often come with a significant price tag. Professional installation for stone or quartz can easily run into thousands of dollars. Even basic laminate can add up quickly for larger kitchens. A DIY concrete project, on the other hand, allows you to achieve a custom look for a fraction of the cost, making it a fantastic budget-friendly alternative for a stylish update.
The appeal of concrete lies in its blend of raw industrial aesthetics and surprising versatility. It's a material that can be shaped, colored, and finished to suit almost any design vision, offering a unique character that mass-produced materials often lack.
Essential Tools And Materials For Your Project
Getting the right stuff together beforehand makes the whole process smoother. You don't want to be halfway through and realize you're missing something. Having all your supplies organized will save you a lot of headaches later on.
Gathering Your Concrete Mix And Additives
For your concrete mix, you'll want something strong. Many DIYers opt for a high-strength concrete mix, sometimes labeled as "5000 psi" or specifically for countertops. You can also find decorative concrete mixes that already have finer aggregates. Beyond the basic mix, consider additives. Fibers, like polypropylene, can be mixed in to reduce shrinkage and cracking. Pigments are also added at this stage if you want to color your worktop. These come in powder or liquid form and are mixed directly into the concrete.
Molding Materials For Custom Shapes
Your mold is essentially the reverse of your finished countertop. Melamine-coated particleboard is a popular choice for building molds because it's smooth, easy to cut, and the melamine coating prevents the concrete from sticking. You'll also need screws to assemble the mold, and importantly, silicone caulk and a caulking gun to seal all the interior seams. This sealing step is vital for preventing leaks and creating those clean, slightly rounded edges on your finished piece. For more complex shapes, you might need flexible materials or specialized form liners.
Tools For Mixing, Pouring, And Finishing
- Mixing: You'll need sturdy buckets or a wheelbarrow for mixing. A mixing paddle attachment for a drill is a lifesaver for getting a consistent mix, or you can use a shovel for smaller batches. A trowel is handy for smoothing.
- Pouring: A level is important to make sure your mold is set correctly. You'll also need a way to vibrate the concrete to release air bubbles, like a rubber mallet to tap the sides of the mold or a concrete vibrator if you're going for a larger project.
- Finishing: Once the concrete has cured enough, you'll need sanding blocks or an orbital sander with various grits of sandpaper (starting coarse and moving to fine). For sealing, you'll want a good quality concrete sealer and applicator pads or rollers. You can find a wide selection of concrete countertop forms and supplies to get you started.
Building your own concrete worktop is a rewarding project, but it requires patience and attention to detail. Don't rush the process, especially when it comes to mixing and curing. The final result will be worth the effort.
Crafting The Perfect Concrete Mix
Alright, let's talk about the heart of your concrete worktop project: the mix itself. This isn't just about grabbing a bag of cement and adding water; getting the right consistency and composition is key to a strong, beautiful, and long-lasting surface. Think of it like baking a cake – the ingredients and how you combine them really matter.
Achieving The Ideal Consistency
So, what's the sweet spot for your concrete mix? You're aiming for something that's workable but not too wet. A common description is like thick oatmeal or maybe creamy peanut butter. It should hold its shape a bit when you scoop it, but still be pourable enough to fill your mold without too much effort. Too much water makes the concrete weak and more likely to crack later on. Not enough water, and it'll be a struggle to mix and get into all the nooks and crannies of your mold, potentially leaving voids. Always start by following the manufacturer's instructions on the bag, and then adjust slightly if needed. A good mixing tub and a sturdy mixing paddle are your best friends here.
Incorporating Color Pigments
Who says concrete has to be boring gray? You can totally add color to your worktop. The easiest way to do this is by adding powdered pigments directly to your dry mix before you add water. This gives you a consistent color all the way through the concrete. You can find these pigments at most hardware stores or specialty concrete supply shops. A little goes a long way, so start with a small amount and add more until you get the shade you're after. It's a good idea to mix the pigment thoroughly into the dry ingredients first to avoid streaks. You can also explore stains or dyes for surface treatments later, but for an all-over color, mixing it in is the way to go. This is where you can really start to personalize your project.
Understanding Water-To-Mix Ratios
This is probably the most critical part of getting your mix right. The water-to-cement ratio directly impacts the strength and durability of your finished worktop. Too much water weakens the concrete significantly. While manufacturers provide guidelines, you'll often find that a slightly stiffer mix, closer to the lower end of the recommended water range, yields a stronger result. It's a balancing act: you need enough water for the cement to hydrate properly and for the mix to be workable, but not so much that it compromises the integrity. Keep a close eye on the consistency as you add water, mixing thoroughly after each addition. You're looking for that perfect, workable texture we talked about earlier.
Don't underestimate the power of vibration when pouring. Tapping the sides of your mold or using a vibrator helps release trapped air bubbles, leading to a much denser and smoother final surface. This step is often overlooked but makes a huge difference.
Reinforcing Your Concrete Worktop For Durability
Concrete is super strong when you push down on it, but it's not so great when you pull it apart. That's where reinforcement comes in. Think of it like adding a skeleton to your worktop. It gives it the extra muscle it needs to handle daily life without developing cracks.
The Importance Of Reinforcement
Without reinforcement, your concrete worktop could be more prone to cracking over time, especially with temperature changes or if something heavy is dropped on it. Adding a reinforcing material helps distribute stress, making the whole slab much more robust and long-lasting. It's a step that really separates a DIY project from a professional-looking, durable finish.
Choosing The Right Reinforcement Material
There are a few options when it comes to beefing up your concrete:
- Fiber Mesh: This is a popular choice for countertops. It's lightweight, easy to cut, and doesn't rust. You can find fiberglass or synthetic fiber meshes. They're great for adding tensile strength without adding a lot of weight.
- Wire Mesh: Similar to chicken wire but usually with a smaller grid. It's affordable and effective, but you need to be careful it doesn't rust if it gets exposed to moisture. Make sure to get a galvanized type.
- Rebar (Steel Rods): For very large or thick slabs, you might consider thin steel rebar. It offers significant strength but can be heavier and harder to cut. You'll need to ensure it's completely encased in concrete.
Proper Placement Within The Mold
This is super important. You don't want your reinforcement sitting right at the bottom of the mold or poking out the sides. The goal is to have it suspended in the middle of the concrete slab. This way, it can do its job effectively, handling the stresses from both the top and bottom. You can use small plastic spacers, bits of plastic, or even wire ties to hold the mesh or rebar up off the mold surface before you pour. It should be about one-third of the way up from the bottom of your mold. If you're working with a thinner countertop, a single layer of mesh is usually sufficient. For thicker ones, you might consider two layers, one near the bottom and one near the top, but always keeping them embedded within the concrete. Learning about Glass Fiber Reinforced Concrete (GFRC) can give you a good idea of how fibers are integrated for strength.
Getting the reinforcement positioned just right is key. It's not just about throwing it in there; it needs to be placed strategically to provide the most benefit. Think of it as building a strong foundation for your worktop's future.
Pouring And Curing Your Cement Worktop
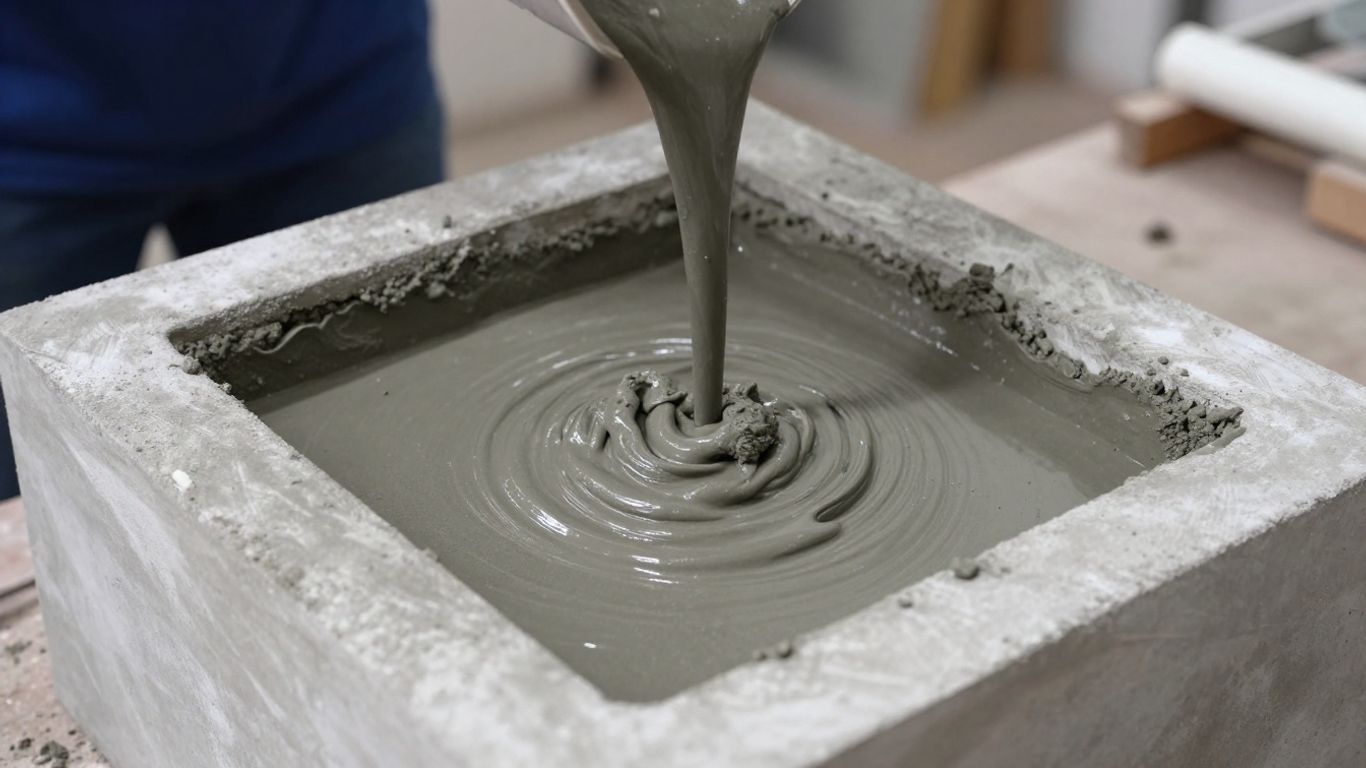
Alright, so you've got your molds all set up and your concrete mix is looking just right. Now comes the part where you actually make the countertop. This is where things get real, and honestly, it’s pretty exciting. But you gotta be careful here, because pouring and curing are super important for getting that smooth, strong finish you're aiming for.
Building And Sealing Your Molds
Before you even think about mixing, make sure your molds are solid. For the sides, melamine board is a good choice because it's smooth and won't stick to the concrete. Screw it together well, and then use silicone caulk along all the inside seams. Run a wet finger or a caulk tool along the bead to make it nice and smooth. This is key to preventing leaks and getting clean edges on your finished piece. A well-sealed mold means less cleanup later and a better-looking final product. If you're using a more complex shape, consider using Cheng foam rails to help define the edges and make the pouring process easier.
Techniques For A Smooth Pour
Getting a nice, even surface without a bunch of air bubbles is the goal here. Work steadily. Don't just dump the whole batch in at once. Pour it into the mold in sections, using a trowel or spatula to gently spread it out. This helps push out air pockets. You can also tap the sides of the mold lightly with a rubber mallet or a piece of wood. This vibration helps the air bubbles rise to the surface where you can pop them or smooth them over. The key is to work the cement into all the corners and edges of your mold. If you're using a mold with intricate details, a smaller trowel or even a paintbrush can help you get the cement into those tight spots.
Allowing Adequate Curing Time
This is probably the most overlooked part of the whole process, but it's a big deal. Curing isn't just letting it dry; it's a chemical process where the cement gains strength. If you rush this, your countertop might end up weak or prone to cracking. You need to keep the cement moist for several days. This can be done by covering it with plastic sheeting or damp cloths. The exact time can vary depending on the type of cement mix you used and the temperature, but generally, you're looking at at least 7 days, and sometimes up to 28 days for maximum strength. For outdoor kitchen projects, proper curing is especially important to handle weather changes. This guide details the process of creating concrete kitchen countertops and emphasizes the importance of this step.
Rushing the curing process is a common mistake that can lead to a weaker, more brittle countertop. Patience during this phase is rewarded with a much more durable final product.
Here's a general timeline for curing:
- Days 1-3: Keep the concrete consistently moist and covered. This is when most of the hydration happens.
- Days 4-7: Continue to keep it moist, but you can start to reduce the frequency. The concrete is gaining significant strength.
- Days 7-28: Allow the concrete to air dry. It will continue to gain strength, reaching its full potential around the 28-day mark.
Achieving A Flawless Finish
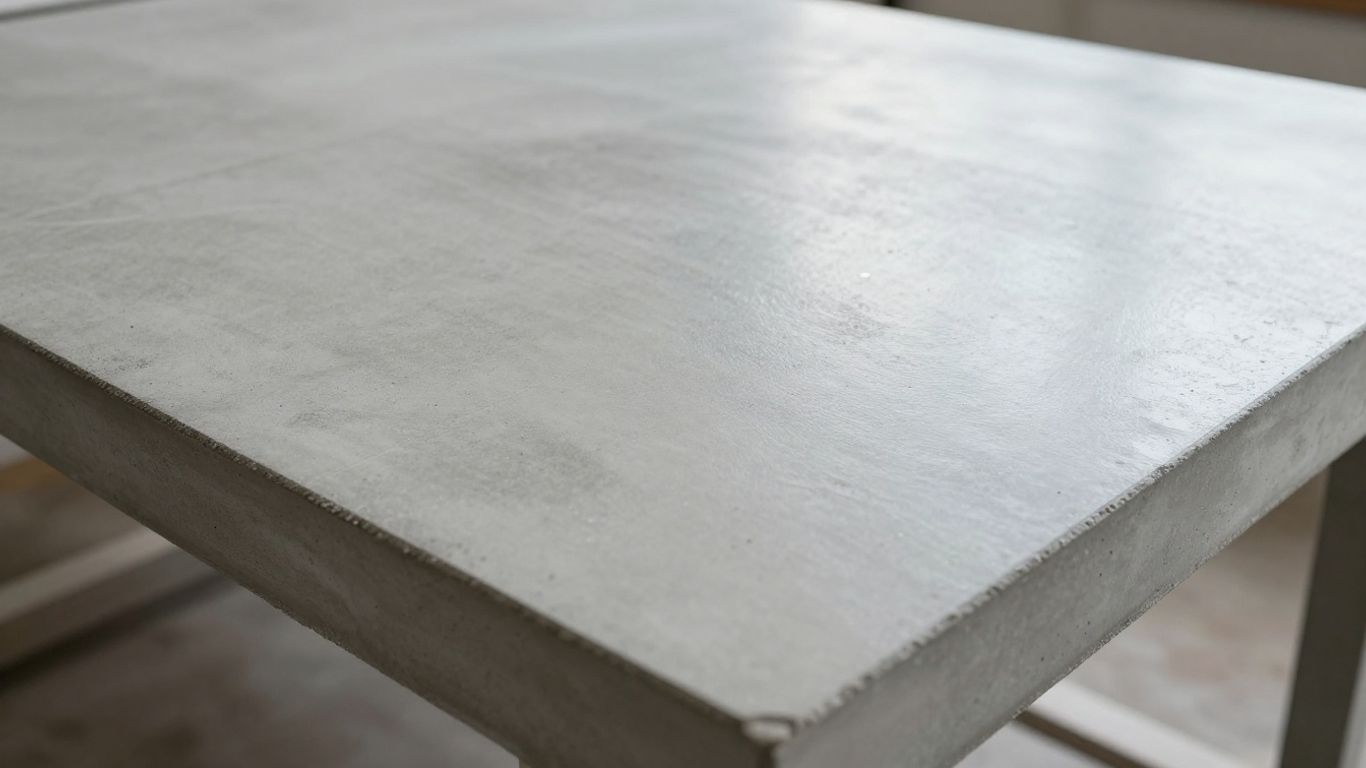
So, your concrete has cured, and it's time to make it look less like a construction material and more like a high-end countertop. This is where we really polish things up, turning that rough pour into something you'll be proud to show off. It takes a bit of elbow grease, but the results are totally worth it.
Removing Air Bubbles For A Solid Surface
Air bubbles are the enemy of a smooth concrete finish. They can weaken the surface and just look plain ugly. After pouring, gently tap the sides of your mold. You can use a rubber mallet or even just a block of wood. This vibration helps those pesky bubbles rise to the top. You can also use a trowel or a spatula to gently coax them out or smooth over the surface where they pop. Don't skip this step; it's key to a dense, strong surface.
Sanding And Polishing Techniques
This is where the real transformation happens. You'll start with a coarser grit sandpaper, maybe around 80 or 100, to knock down any high spots or rough patches. Then, you gradually move to finer grits – think 200, 400, 800, and even higher if you want that super smooth feel. A random orbital sander will make this process go a lot faster than doing it by hand. If you're aiming for a really glossy look, you can explore wet sanding or polishing methods, which can give your worktop that almost wet, polished stone appearance. This process is similar to how you'd polish concrete countertops for a sleek look.
Applying Protective Sealants And Waxes
Once you've got that beautiful, smooth surface, you absolutely need to seal it. Concrete is porous, meaning spills can soak in and cause stains. A good sealer acts like a shield. There are different types, but a penetrating sealer is a solid choice for a natural look. You'll want to apply it according to the product's directions, usually with a microfiber cloth. Make sure the surface is totally clean and dry before you start. You might need a couple of coats for good protection. This step is vital for the long-term beauty and durability of your worktop.
Patience is your best friend during the finishing stages. Rushing through sanding or sealing can lead to a less-than-perfect result. Take your time, follow the steps carefully, and you'll end up with a worktop you're really proud of.
Maintaining Your New Concrete Worktop
So, you've put in the work and now have a fantastic concrete countertop. That's awesome! But like anything you want to last, it needs a little attention now and then. Don't stress, it's not complicated, just a few simple habits to keep it looking great.
Daily Cleaning Best Practices
For everyday messes, like crumbs after breakfast or a small spill, you really don't need much. A soft cloth or sponge with some warm water usually does the trick. Just give it a wipe. If something's a bit stickier, a mild, pH-neutral cleaner works well. Avoid anything harsh or abrasive, though; we don't want to scratch that nice finish you worked so hard on. Think of it like washing your favorite dishes – gentle is the way to go. You can find some good options for mild cleaners that are specifically made for surfaces like this.
Understanding Stain Prevention
Concrete is naturally porous, meaning spills can soak in if you're not careful. That's where sealing comes in, which you hopefully did during the finishing stage. But even with a good seal, it's smart to be proactive. Wipe up spills, especially things like red wine, coffee, or oil, as soon as they happen. For cutting, it's best to use a cutting board. While concrete is tough, dragging knives directly on it can eventually leave marks. If you're placing hot pans on the counter, use trivets. It’s better to be safe than sorry, right?
Periodic Sealing For Longevity
Over time, the sealant might wear down a bit, especially in areas that get a lot of use. You might notice water starting to bead up less. When that happens, it's time for a reseal. How often you need to do this depends on how much you use your worktop and what kind of sealant you used, but generally, every 1-3 years is a good timeframe. You can usually tell when it's time. Just follow the same steps you did when you first sealed it. It might seem like a lot of upkeep, but honestly, it's pretty straightforward and keeps your worktop looking fantastic for years. You can find good options for sealants online or at hardware stores.
Keeping your concrete worktop clean and protected doesn't require a lot of specialized products or techniques. Simple, consistent care is the key to its long-term beauty and function.
The Takeaway: A Solid Choice for Your Home
So, you've seen that making your own concrete countertops is totally possible. It's not some impossible feat reserved for pros. Sure, it takes some elbow grease and a bit of patience, especially when you're mixing and waiting for things to cure. But honestly, the end result is pretty awesome. You get a custom look that's way more affordable than stone, and there's a real sense of accomplishment knowing you built it yourself. If you're looking to update your kitchen or bathroom without emptying your wallet, giving DIY concrete a try is definitely worth considering. It's a practical, stylish, and budget-friendly way to get a brand-new look.
Frequently Asked Questions
Is a concrete countertop a good idea for my kitchen?
Yes, concrete countertops are a great choice if you want a stylish look without spending a lot of money. They give your kitchen a unique, modern feel and are pretty tough if you take care of them. It's a fantastic way to update your space on a budget.
How much does it cost to make my own concrete countertop?
Making your own concrete countertop is much cheaper than hiring someone. You'll mainly pay for the cement mix, any color you want to add, sealant, and materials to build the mold. For most people, the total cost is usually between $20 and $100, depending on the size and what materials you pick.
What are the most important tools and materials I'll need?
You'll need cement mix, water, and maybe some extras for strength or color. For building, grab some plywood or melamine for your molds, screws, caulk, and something to smooth the surface like a trowel. Don't forget safety gear like gloves and glasses, plus tools for mixing and pouring.
How do I get a smooth finish on my concrete countertop?
Getting a smooth finish starts with good preparation. Use a mold that's sealed well. When you mix the cement, aim for a consistency like thick pancake batter. After pouring, smooth the surface with a trowel. Once it's dry, you can sand and polish it for a really sleek look.
Will my concrete countertop get stained or damaged easily?
Concrete can sometimes get stained or scratched if it's not protected. That's why sealing your countertop is really important. A good sealant makes it water-resistant and helps prevent most common kitchen spills and marks from causing damage. Cleaning it regularly also helps a lot.
Can concrete countertops crack?
It's possible, but you can reduce the risk. The main reason concrete counters crack is not getting all the air bubbles out when you pour the concrete. Sometimes, tiny cracks can appear as the concrete dries and shrinks, but these are usually just small cosmetic issues.


